تفعيل شريحة جوجل فاى - كوكل فاى - غوغل فاى - google fi
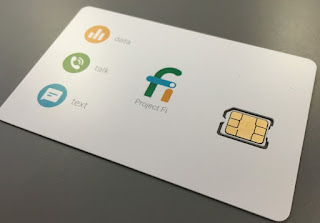

تفعيل شريحة جوجل فاى - كوكل فاى - غوغل فاى - google fi

 تفعيل شريحة جوجل فاى - كوكل فاى - غوغل فاى - google fi

تفعيل شريحة جوجل فاى - كوكل فاى - غوغل فاى - google fi

جهز بطاقة SIM وجهاز متوافق.
1. قم بتنشيط بطاقة SIM الخاصة بالبيانات فقط:

    افتح fi.google.com/data.
    أدخل الرمز الموجود على عبوة بطاقة SIM الخاصة بك.

2. أدخل بطاقة SIM الخاصة بك

    لأجهزة Fi: تعرف على كيفية إدخال بطاقة SIM الخاصة بك.
    بالنسبة لجميع الأجهزة الأخرى: تحقق من الشركة المصنعة للجهاز للحصول على التعليمات.

3. تكوين جهازك

لأجهزة Android:

ملاحظة: تعتمد هذه التعليمات على أجهزة Nexus اللوحية التي تعمل بنظام Android 7.0 وما فوق. قد تختلف الخطوات لجهازك الخاص.

    افتح تطبيق الإعدادات على جهازك.
    اضغط على الشبكة والإنترنت.
    اضغط على شبكة الهاتف المحمول ثم الوصول المتقدم ثم أشر الأسماء.
    اضغط على + (في الجزء العلوي من الشاشة).
    اضغط على الاسم وأدخل "Google Fi".
    اضغط على APN وأدخل "h2g2".
    عد للصفحة السابقة.
    حدد Google Fi من القائمة.
    إذا نجح إعداد بطاقة SIM ، فسترى "شبكة Fi" أو "Google Fi" أو "T-Mobile" أعلى شاشتك.

لأجهزة iPhone و iPad:

ملاحظة: هذه الإرشادات عبارة عن أجهزة تعتمد على نظام التشغيل iOS 10 وما فوق. قد تختلف الخطوات لجهازك الخاص.

    افتح تطبيق الإعدادات على جهازك.
    اضغط على البيانات الخلوية ثم شبكة البيانات الخلوية ثم إعدادات APN.
    بالنسبة للبيانات الخلوية APN ، أدخل "h2g2".

بعد نجاح إعداد بطاقة SIM ، سترى "Google Fi" أو "T-Mobile" في الجزء العلوي من الشاشة الرئيسية لجهازك.

Have your SIM card and compatible device ready.

1. Activate your data-only SIM:

  1. Open fi.google.com/data.
  2. Enter the code found on the packaging of your SIM card.

2. Insert your SIM card

3. Configure your device

For Android devices:
Note: These instructions are based on Nexus tablets running Android 7.0 and above. Steps may vary for your particular device.
  1. Open the Settings app on your device.
  2. Tap Network & Internet.
  3. Tap Mobile network and then Advanced Access and then Point Names.
  4. Tap + (at the top of the screen).
  5. Tap Name and enter "Google Fi".
  6. Tap APN and enter "h2g2".
  7. Go back to the previous page.
  8. Select Google Fi from the list.
  9. If SIM setup is successful, you’ll see “Fi Network,” "Google Fi," or "T-Mobile" at the top of your screen. 
For iPhone & iPad devices:
Note: These instructions are based devices running iOS 10 and above. Steps may vary for your particular device.
  1. Open the Settings app on your device.
  2. Tap Cellular Data and then Cellular Data Network and then APN Settings.
  3. For Cellular Data APN, enter “h2g2”.
After your SIM setup is successful, you’ll see "Google Fi" or "T-Mobile" at the top of your device’s home screen.


Review

Comments

Popular posts from this blog

Broom Challenge how to do the Trick

 Broom Challenge how to do the Trick you can stand a broom up only today because of a gravitational pull that will occur only today." People are also citing NASA saying NASA announced that on Feb. 10, and only Feb. 10, can people stand up a broom because of the earth’s gravitational pull. NASA has not posted anything about the broom challenge. In case you haven’t seen this if you stand a broom up today only it will balance itself and stay in place. Gravitational pull that will only occur today. # nasa # broomchallenge Review

project fi iPhone

How to download and use project Google fi iPhone From App Store project Google fi iPhone   if you have an iPhone 5S, 6, SE or newer, provided that it has been carrier unlocked. Though if you have a newer iPhone, this shouldn’t matter as much, as  new iPhones can use LTE on any American LTE networks.  This makes Google Fi’s caveats for iOS all the more disappointing, as it won’t allow carrier switching but will  automatically default to T-Mobile’s network  for calls, texts, and data. You’ll also have to update your MMS settings to send and receive texts to non-iPhones, but iMessage will work right out of the box. Google also says you might have to update these settings a couple of times a year if they get changed due to an iOS update.  you can find out your supported iPhone Model for project Fi this LINK and Download project Google Fi from App Store    

Setup Google Shopping and Connect it To Google Adsense

 Setup Google Shopping and Connect it To Google Adsense   What is Google Shopping? Google Shopping, formerly known as Google Product Listing Ads (PLA), is a cost per click (CPC) advertising powered by two platforms: Google Ads ( formerly AdWords) and Google Merchant Center . In a nutshell, the Google Merchant Center is where your product feed resides in and Google Ads is where you purchase the ads, set budget, control bids, get insights, etc. We will talk more about them later on. Google Shopping ads enable shoppers to swiftly and conveniently find your online store’s products while they’re searching on Google. Shoppers are provided with these five key product information inside your ads that will help in their purchase decision and product comparison, without the need for merchants to build separate ads for each product they sell: Product Image – possible automatic cropping of the image to focus more on the product. Product Title – the name of the produc...